Easy but awesome backgrounds?

Kallen

Small Fish
Sep 26, 2009
38
0
0
Kettering, OH
#1
I have a 90G freshwater aquarium. I've had it for about 8 years and I am growing more and more unsatisfied by it's decor. I have the standard picture background taped to the back of it and while it look ok, I want more. I've seen background online that are DIY projects that are a work of art. Like these for example:


I have neither the artistry nor the patients to build something like that myself. These guys uses sytrofoam boards and coated them with cement. So the tanks had to be drained and these built in place. (The second is actually multiple pieces but the first is one big piece). Therein lies the other problem for me...I don't want to drain my tank and have no where to keep my first/plants in the meantime.

So, my question is, are there any sort of kits or something I can get that I could put into my existing non-drained tank that would look anywhere near this good? I know I could simply stack real stones in there, but that would add a lot of weight, plus I would be afraid of shifting.
 

Thyra

Superstar Fish
Jun 2, 2010
1,891
0
0
Yelm, WA
#2
A long time back they use to make plastic preformed (3-D) backgrounds you could tape to the back of your tank, but I haven't seen them in years. I have used plexiglass mirror for background with great success. Even my betta in my community tank does not get excited about it and it certainly adds dimension.
 

KcMopar

Superstar Fish
#4
My local has some that are only a fraction as thick along all the sides. They are like those ones above but are only about 2 inches thick. They look they would be able to install with much draining. I might stop by there today after work to get some live rock, I will try to remember to get the brand name.
 

se7en2686

Medium Fish
Jul 24, 2011
67
0
0
Richfield Ohio
#5
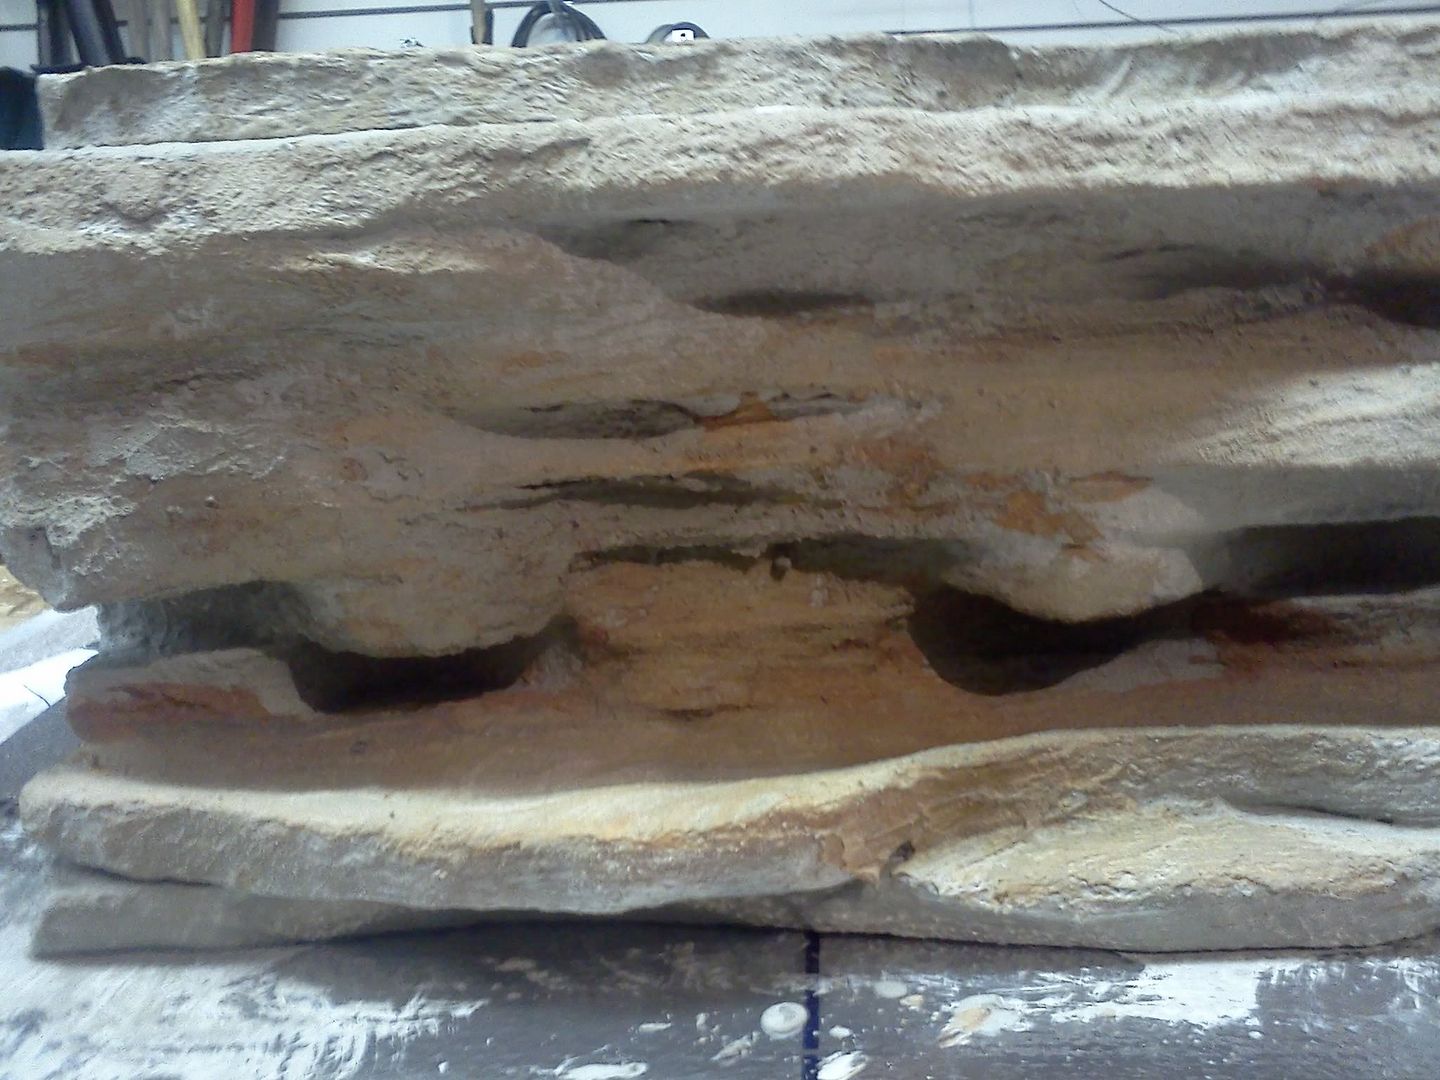
So ive just finished my 3d background like the above... its actually far easier then you may think. anyhow what im doing so i dont have to drain my tank is im placing it inside a large blue toat and soaking it in there for while.. what did so i dont have to glue it to my tank is made the bottom very thick and wide so i could fill it with lead weights.. if it works ill let you know but im soaking for 2 weeks so itll be a little bit. but honestly its seriously way easier then i had thought to make one. this is mine bottom is full of lead weights hopefully it works without silicone Background.jpg
 

Kallen

Small Fish
Sep 26, 2009
38
0
0
Kettering, OH
#7
Thanks for the replied!

@Thyra - Ya know, i was pretty sure I remember seeing kits, but it's been a long time ago (well
before I aquired this aquarium). I had thought about a mirror, but not sure where to look for one. I
could get one custom cut from a local glass store but havn't looked into it.

@McMopar - I looked at 2 of the 3 lpc and they have only the rolls of background. Any info
on those would be appreciated!

@se7en2686 - I hadn't even thought about doing the cycle in a seperate tank...does your tank have a
center support? If so, how will you get that in the tank?
That BTW is gorgeous and is exactly what I would like to do. The pics I posted above I like the stone
one withe the plants on it...I would love do what you did. That looks very realistic and will be
gorgeous in your tank. PLEASE post pics (PM me?) when you have in installed. Is lead a good idea? No fear of it poisioning the fish?

How much would you charge someone to make another? :)
 

se7en2686

Medium Fish
Jul 24, 2011
67
0
0
Richfield Ohio
#8
@Kallen Thank you very much for the kind words. no my tank does not have a center support its a 10 gallon. Like you i was worried about doing a background and how much work it would be and it not being nice... as im not even close to artistic lol. But i decided id atleast try and cut out the shapes.. i seriously cut out the shapes in under 20 mins. there is no Wrong way.. what i did was i took a long piece and kept trying to put it inside the tank until it fit.. then used it as a template... that was the hardest part.. cutting the first piece lol i can make a step by step if you would like it... all in all it prolly took me 2 days but that was because of letting the mortar dry. Also i have no idea what id charge to build one lol never thought about it. As far as the lead weights the lead weights are what the weights are made of that you buy for your plants. the little heavy bendy metal is already lead. But if you'd Like ill write out as in detail of a step by step that i can for you or anyone else. Trust me Kallen, Im not a creative person if i hadnt watched someone do it on youtube who looked like a "Tard" i wouldnt of even tried it myself. lol this is the
Easiest DIY ive done. ive made filters, Lights, dirt substrate and other decorations... the background was Super easy :)
 

Thyra

Superstar Fish
Jun 2, 2010
1,891
0
0
Yelm, WA
#9
The Plexiglas mirror (I suspect that is a trade name) is plastic - now I will share - There were a bunch of pieces left over from a mirror my husband wanted on the bedroom ceiling- I have found various uses for those pieces and found they cut easily with a scroll saw, are easy to handle and you can cut them to fit between the back frame on your tanks so that is takes very little to hold it in place. Mine are just held in place by the H.O.B. One word of caution. Practice on a scrap first. As I remember the backing scratches easily and masking tape will pull it off. I used a hacksaw blade and I am pretty sure I cut from the mirror side - which normally would be against advice, but it has been a while since I did it. Glass mirror would work, but its heavy and cutting it yourself would be difficult.
 

Kallen

Small Fish
Sep 26, 2009
38
0
0
Kettering, OH
#10
If you have a little time then yea I would appreciate some directions! Thanks!

How do you plan on situation your filters/heater? I have a HOB Penguin 300 on one side, and my Magnum350 intake hangs on the other with my heater in about the middle. I believe I would have to make opening in front of the filter intakes to allow flow. I wouldn't want a gap behind the background for fish to get into. I would too need to make it in sections to allow for the center support..... Seriously 20 minutes? That's very impressive.
 

Thyra

Superstar Fish
Jun 2, 2010
1,891
0
0
Yelm, WA
#11
I suspect you have already covered this part of it, but aren't you coating Styrofoam with a concrete/cement type product and does it not have to cure for quite a while before you use it with fish? I remember my son made a large pond outside and then found he didn't wait long enough before introducing his fish and lost them all. Also what type of paint do you use? It seems to me I ask once before about what type of paint could be used for decor and all responses were negative, but once it cures, I would think acrylics would be safe. Obviously manufacturers use some kind of paint.
 

se7en2686

Medium Fish
Jul 24, 2011
67
0
0
Richfield Ohio
#12
well the tank im using this is is a 10 Gallon, With a Crown fin betta. two Mystery snails and My wife is busting over an ADF but i havent done much research on them yet. but im going to use a small submersion filter. and i plan on placing it ontop of the rock wall.. its going to be a planted tank with low light plants. but yes ive seen many just cut holes for the intakes. same for power heads it wouldnt be real difficult.. anyhow yes tonight ill write a DIY n post it in here...
please forgive my spelling and grammar as its awful LMAO.
 

se7en2686

Medium Fish
Jul 24, 2011
67
0
0
Richfield Ohio
#13
DIY 3D Rock wall background.
Step 1. Measure the inside of the aquarium width and height.
Step 2. with the measurements decide the size of wall you would like. Mine is 4 1/2 inches wide at its widest spot.
Step 3. cut out a random shape on one side making sure the other side is flat. The Flat side is what will be agenst the aquarium wall so the flatter the better.
Step 4. What i did was take the first piece trace it onto the 2nd piece of Styrofoam and make cutting choice from there. repeat Step 3 and 4 until desired height.

Step 5. take all the pieces you have stack them up on one another making the perfect shape. doing this it may help you to stick tooth picks inside to hold them together. as some pieces may not want to balance accordingly *mine did not*.
Step 6. once you have the desired shape number them on the back (i used a sharpie) so you know the correct
place. the bottom piece i dug out the middle and filled with fishing lead weights up to you.
Step 7. Now pull each piece up and silicone it down to the next. So that they dont come apart in the tank. wait a
good 24 to 48 hours before continuing.
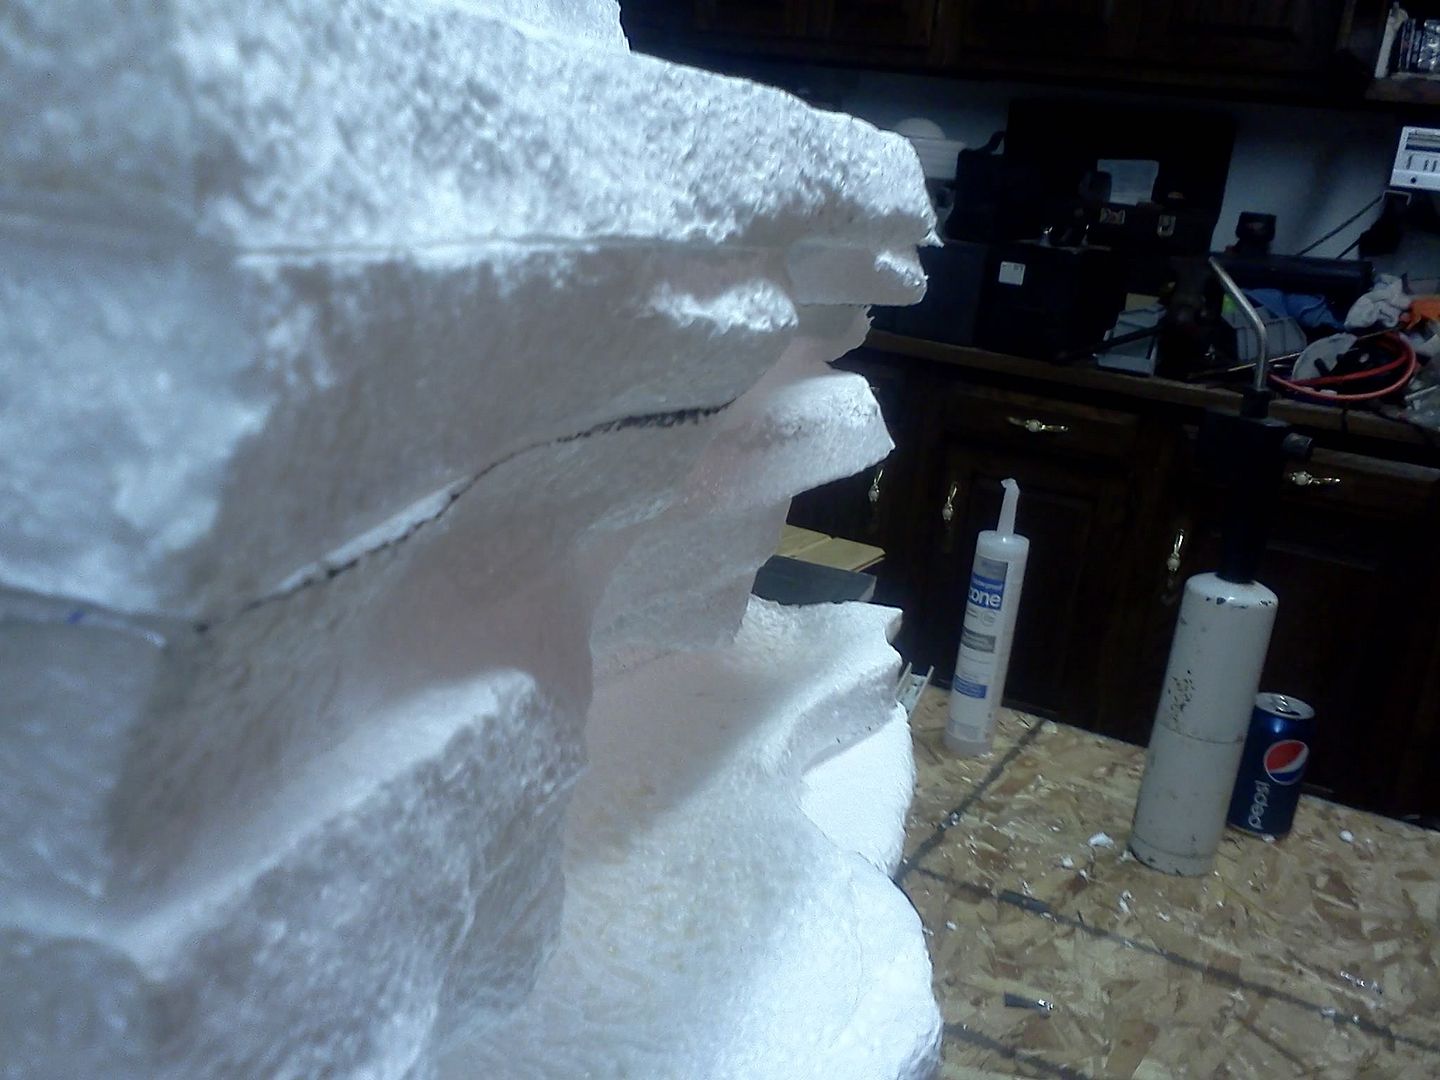
Step 7.5 (forgot lol) i took a torch and melted the Styrofoam so it gave it a more rounded less flake look. be-careful and practice on a scrap piece before you try this.
Step 8. mix the quick mix Mortar with a bit more water then the container says. as you want it to be a bit runny.
Step 9. Use a paint brush and paint the front and both sides with the mortar. Remember there is NO WRONG WAY
to do this. if you blob it a bit hey it just looks natural anyway nothing in nature is Perfectly straight.
Step 10. let it dry for about an hour or two, wait till its dry to the touch.
Step 11. once its dry to the touch paint it again i added color this time *Up to you*
Step 12. once you have added 2 or 3 coats and its colored like you want give it a full 24 hours to dry...
Step 13. i placed mine into a large container big enough for it to be submerged, i changed the water 4 times
already.
now the next part i cant tell you forsure but if my weights do not work and it moves around alot i have a 2nd idea
petsmart has a puddy that sopposedly hardens in the water and doesnt hurt the fish. its for saltwater tanks to
keep live rock together. i have several photos for you to take a peek at :) hope this helps, Ive never written a DIY before and im kinda awful at it lol.

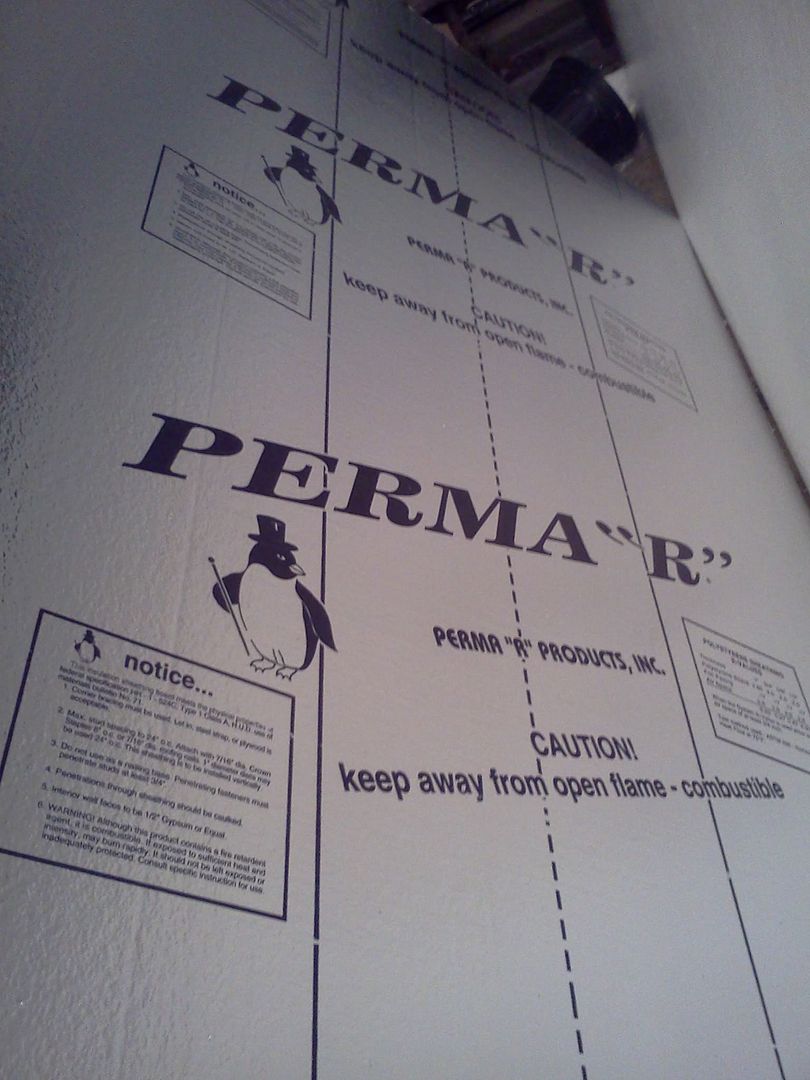
This is the Board i used


this is after the melting


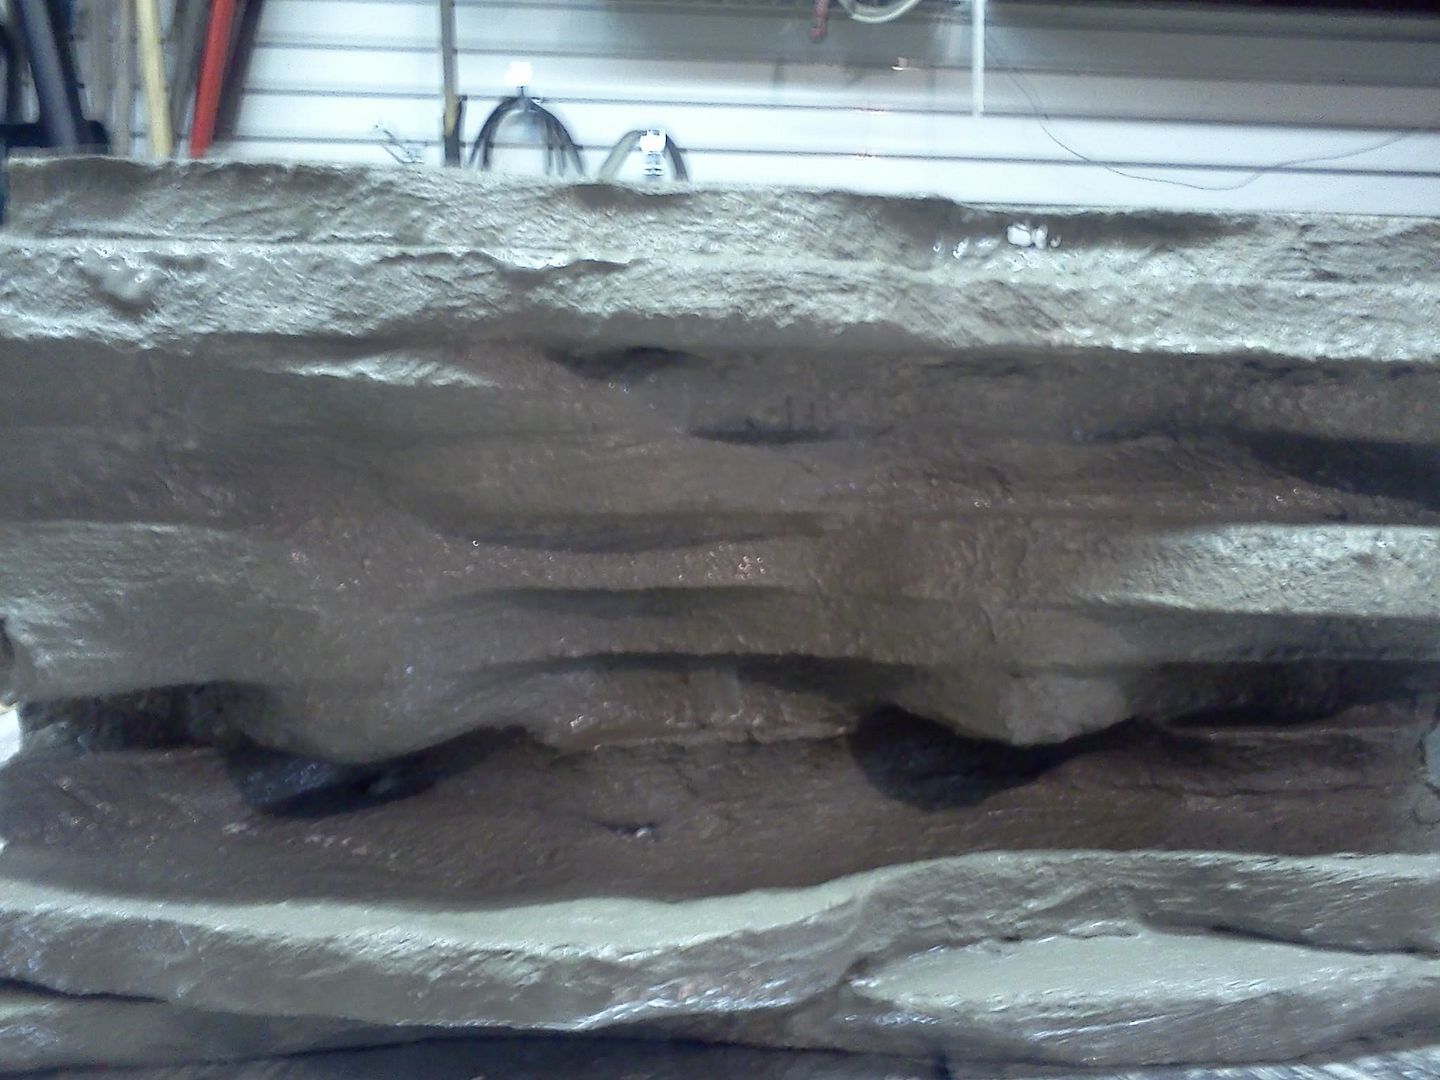
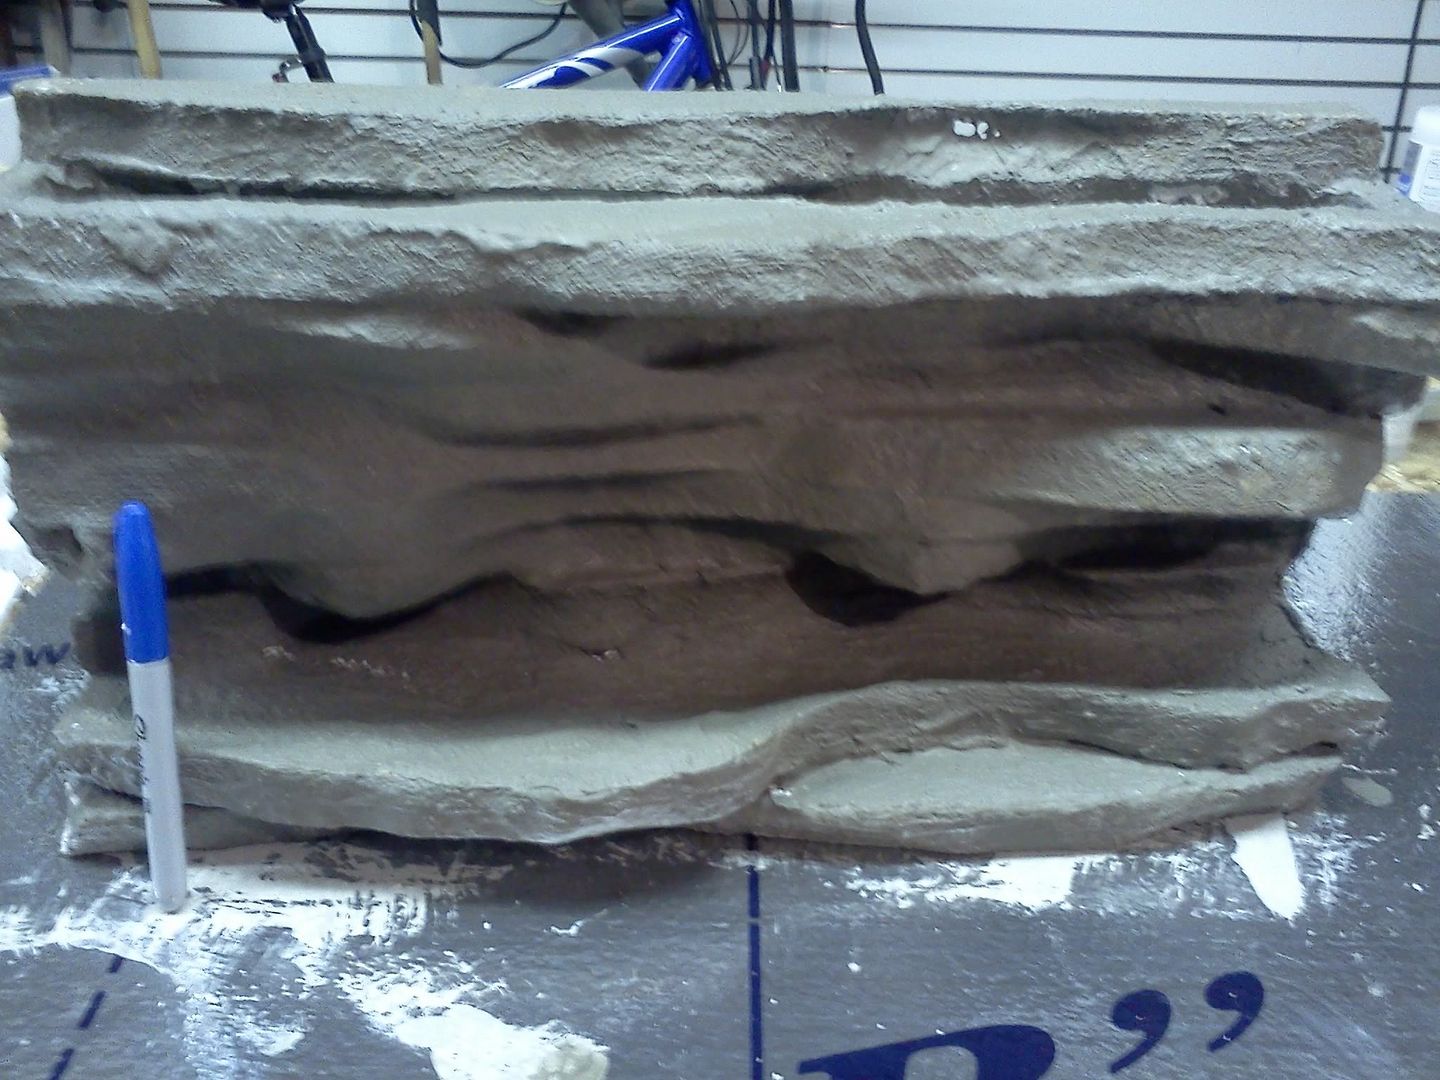
First coat of moater


2nd coat


3d coat


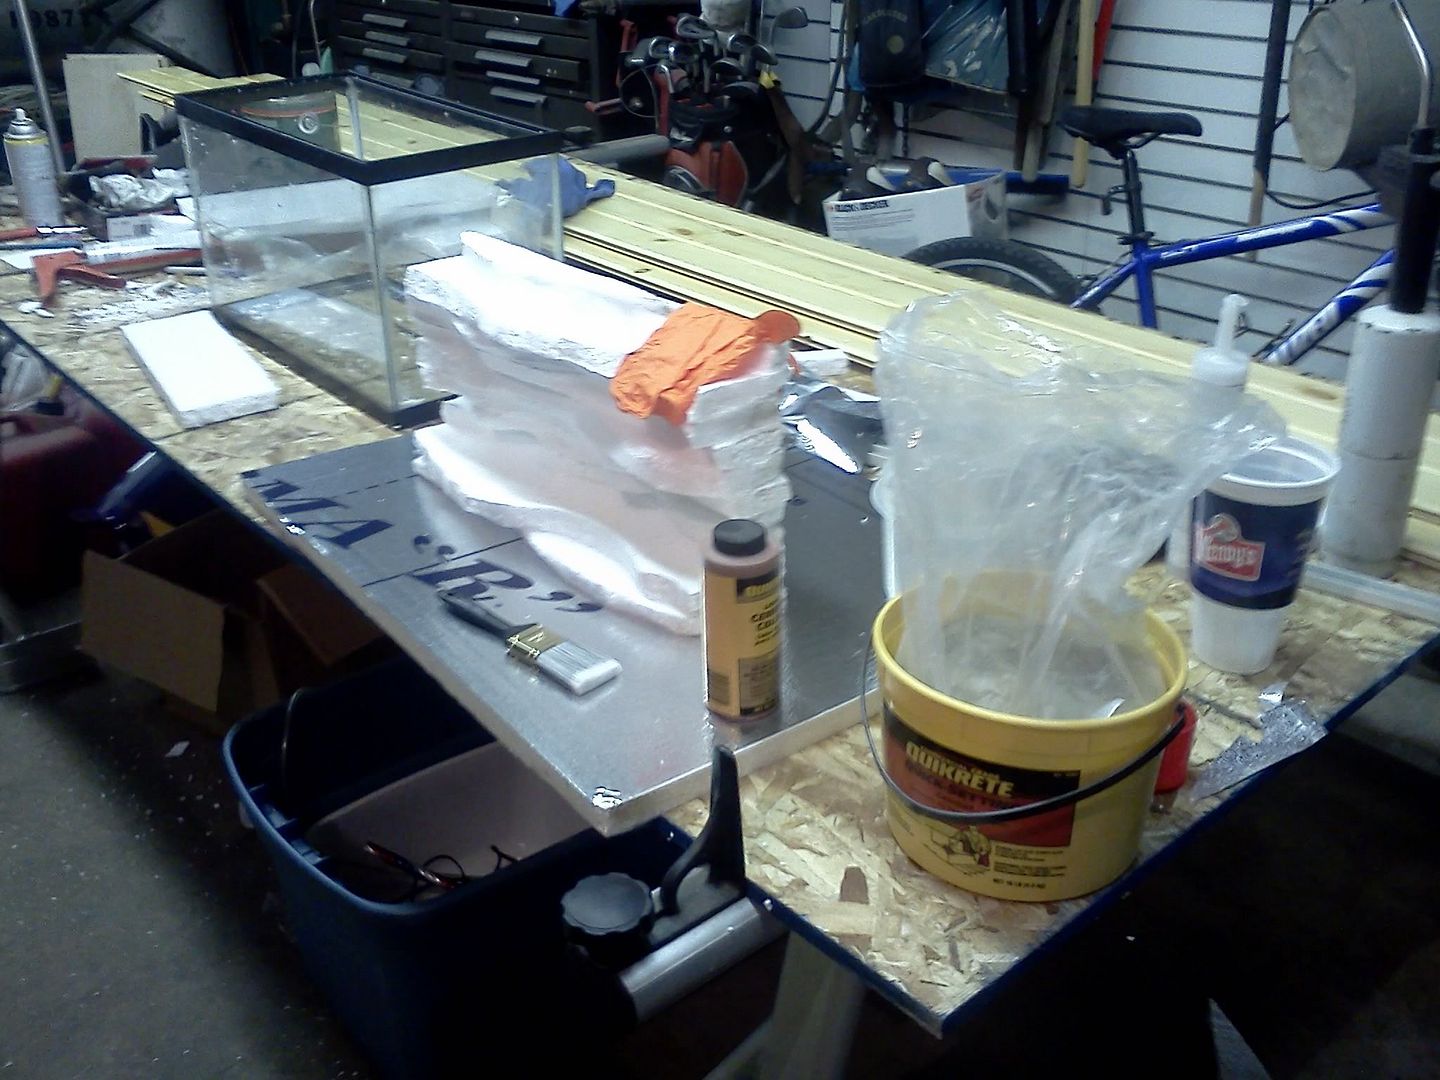
my work bench


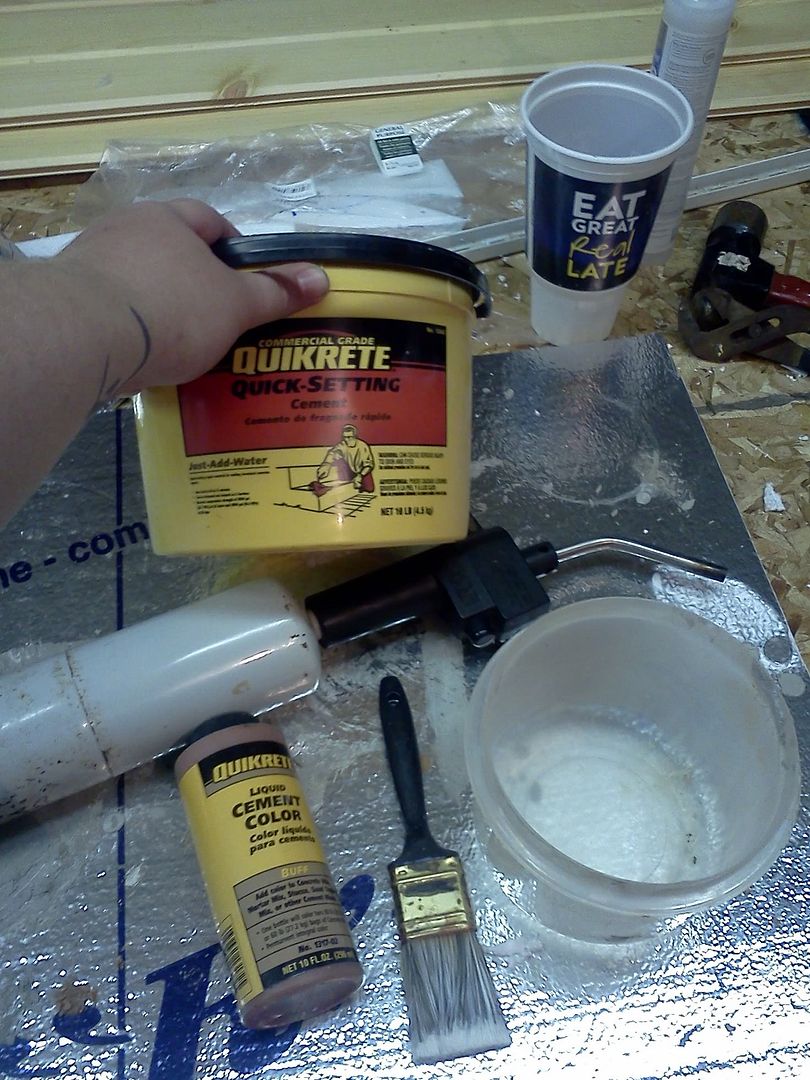
everything i needed except a razor knife
 

Last edited:

Kallen

Small Fish
Sep 26, 2009
38
0
0
Kettering, OH
#15
This is great stuff, thanks for posting this! What surprised me is the scale. It looks lot bigger than it really is.
What is the "liquid cement color"? I'm not familiar with that.

How will you have your filter set up? I have been thinking about this. As I described above, I have two filter (so two intakes) and a heater. What would you recommend?

And your instructions are perfectly clear. It does sound easier than I thought..... Since I will have to do segments because of the middle support it'll make the soaking stage a little easier.
 

Thyra

Superstar Fish
Jun 2, 2010
1,891
0
0
Yelm, WA
#16
Have you considered what this does to the size of a 10g tank? Don't get me wrong, I think it is a very interesting idea, and would be tempted to try it, but If your 10g is the same dimensions as mine and your Styrofoam form is no more than 3 inches thick on an average, you have effectively reduced the 10g to about 7g and then you still have to consider the decor and other things that take up any space. On a larger tank it wouldn't have that much of an impact.
 

se7en2686

Medium Fish
Jul 24, 2011
67
0
0
Richfield Ohio
#18
@Kallen im using two Elite Mini's not quite rated for a 10G but as Thyra Stated with the background it is a bit smaller. ive left some space from the top of the tank for these to stick on the inside wall. but to use your HOB filters, what id do is cut out my shapes position them as i like using toothpicks to hold them together.. and maybe use a drywall saw or maybe a long razor knife one with the long extendable blade. then id cut out a long shaft for it to fit behind big enough or you to pull it out for cleaning... and where ever the intake ends id cut a hole big enough for it to suck
water easily. i cant stress enough make the hole big enough cause even fish will swim back and up it so leave some space. the color i bought was Buff and its right beside the Quikrete its also in the photo above. its a Quikrete name brand and i only used a cap full at best. just to give it a redish sand stone color.
 

se7en2686

Medium Fish
Jul 24, 2011
67
0
0
Richfield Ohio
#19
@Thyra like Kallen i was worried about how it would look and if i was good enough to do it.... as i couldn't fold a paper airplane to save my life.
Im not that artistic lol. i also had the ability to use a 2nd 10 gallon for size ect (it doesnt hold water anymore so couldnt use it for the actual test.
Also i use my 10 for a single Crown fin Betta with two mystery snails... i know it cuts it down a bit but right now its ugly as i also dont know how
to aqua scape either.... My 29 planted tank she loves to look at and just watch. So what im planning is in the top of the rock wall i cut out a
planter. im going to put semi aquatic plants like Lucky Bamboo and some other randoms what come out the top of the tank.
then at the bottom im going to use some low light guys and thats about all the deco im putting in is some plants. i made a large over hang
in the Rock wall for him to hide under but we will see get a view of him. so i think he will be happy. What i seen was a Large vase with some plants in it and a Betta inside i was told they dont need feed but you and i both know thats bullshxt. However i love that idea as does my wife. so im going to make the same thing just on a grander scale so the fish doesnt have a "Crappy" Life ... i hope she likes it she doesnt know
anything about it yet :)

ttyl :)
 

KcMopar

Superstar Fish
#20
@KcMopar - I looked at 2 of the 3 lpc and they have only the rolls of background. Any info
on those would be appreciated!
I forgot to look when I was there. They had gotten in some great Live Rock!!!!! And I never thought about it after seeing the LR. I have to go back this week anyway for some stuff they were out of. It may not be until Friday. The ones they have are like rubbery molds made to fit your size of tank.